HyFlex Classroom Instructions Guide
| HyFlex Classroom Instructions Guide | |
|---|---|
| How to Login in. | Page 2 |
| How to adjust volume settings on Dell monitors. | Pages 3 |
| How to login into Zoom and sign in. | Pages 4-7 |
| How to set up your video and audio settings on Zoom. | Pages 7-9 |
| Instructors Stations: digital control panel for Hyflex. | Pages 10-11 |
| Instructors Stations: analog control panel for Hyflex. | Pages 12-13 |
| How to share your screen: second camera. | Page 14 |
| How to properly sign out of Zoom and Dell monitor. | Page 15-16 |
Each HyFlex classroom has a touch screen, All-in-One Dell computer.
Please note that the picture on the computer screen will refresh periodically, therefore, the picture below might not match what you see in your classroom computer.
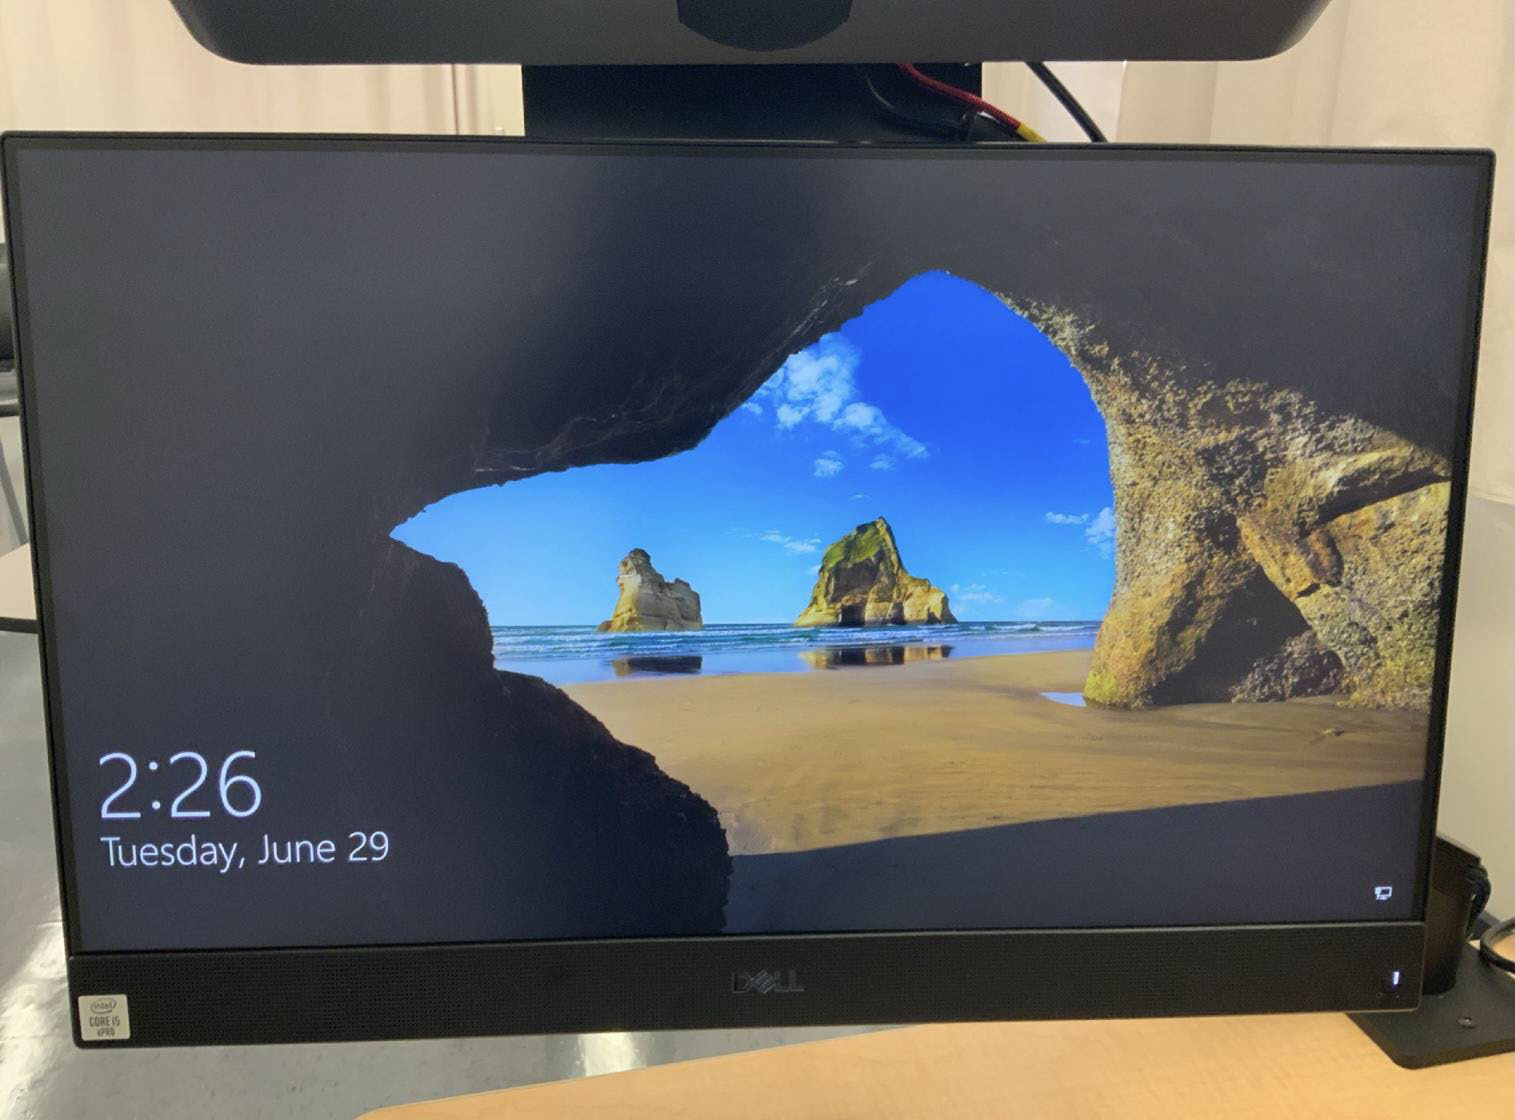
Since you will be entering your Fresno State username and password into this computer, please confirm that the projector is off or not displaying on the classroom screen. Classrooms do not have a keyboard; therefore, you will need to:
- On the computer screen, swipe up to get the login screen to appear to enter your username
and password.
- Keep in mind that the touch keyboard will reveal your password so make sure you are not displaying your monitor screen
- Choose “Other User” - this is located at the lower left-hand corner of the computer screen
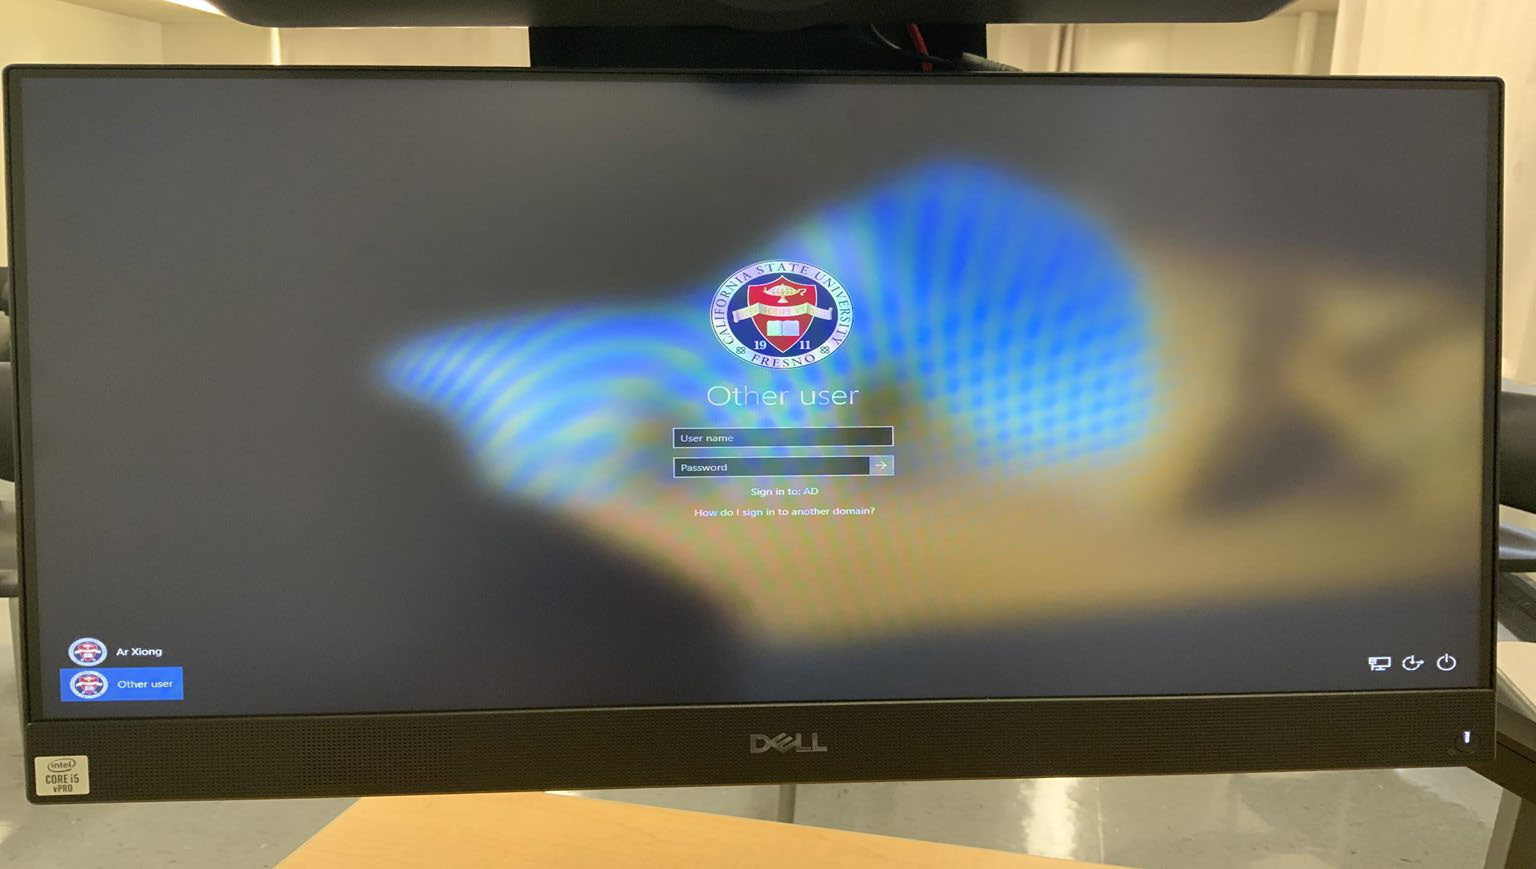
- Log in to the computer using your Fresno State username and password.
- Ex: Username: giraffe123@mail.fresnostate.edu
The following steps will only be required the first time you use the computer in a new classroom.
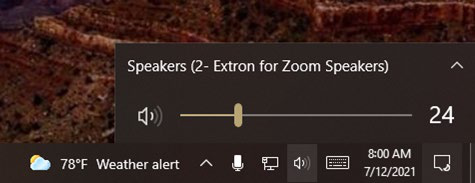
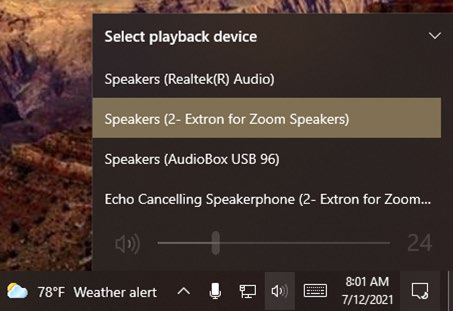
- Check the speakers by clicking on the speaker’s image (see below)1. Set the volume between 20-25. Verify that the speaker’s name shows “* Extron for Zoom Speakers” ² (*=wild, could be blank or any #value). If something else is showing, press the carrot (up arrow displayed on the right upper hand corner) and search for the speaker named Extron for Zoom Speakers ³.
Now that the computer speakers/sound have been set, it is time to log in to Zoom.
Launch Zoom, either by using the Zoom shortcut on the Desktop (double click on it or hold it down and choose Open). If the Zoom shortcut is not on the Desktop, then search for Zoom on the taskbar and open it.
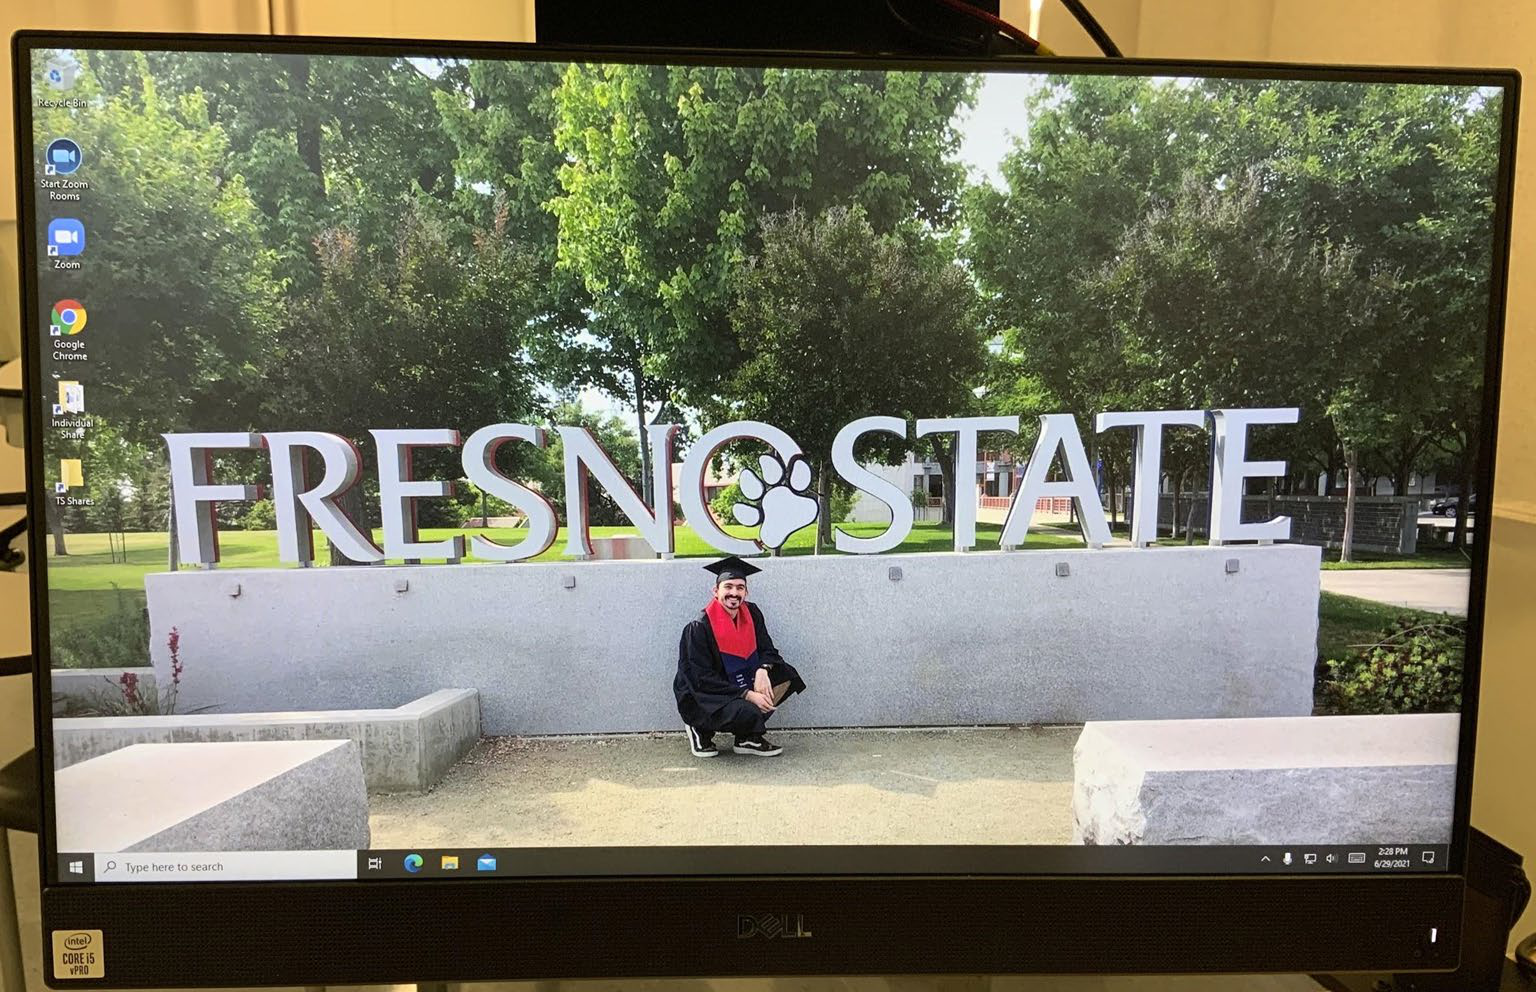
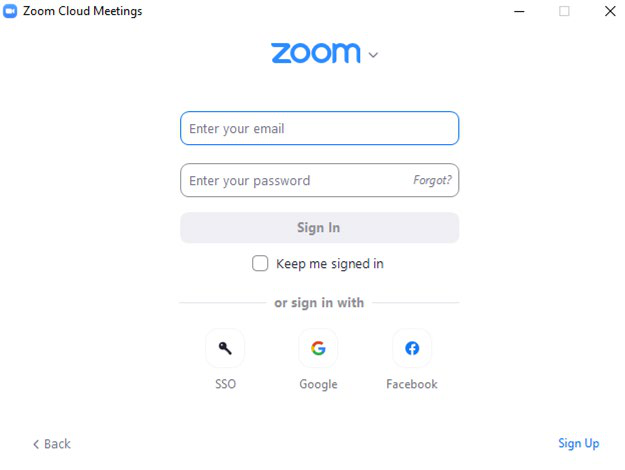
- Click on Sign In; on the Sign In screen, choose Sign In with SSO
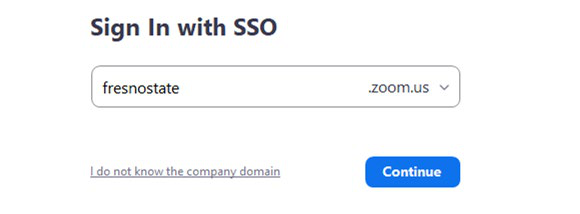
- Company domain will state “fresnostate.zoom.us” press “Continue”.
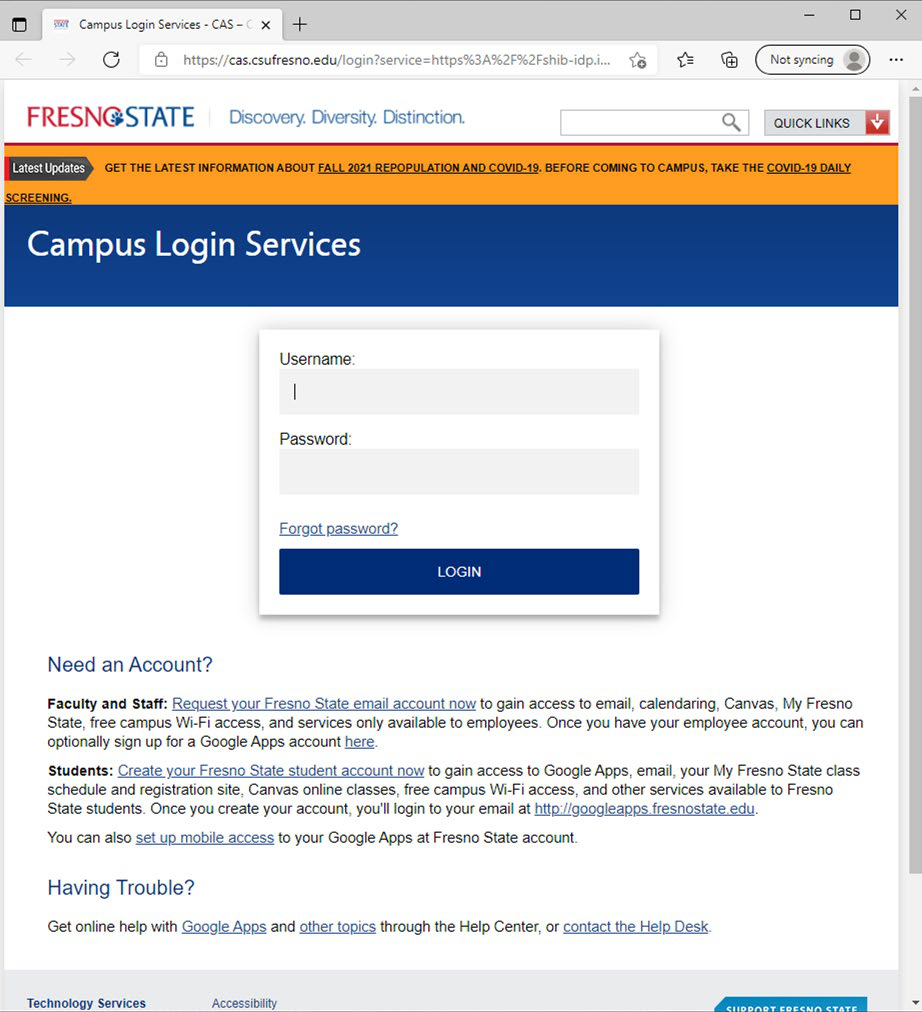
- Enter your Fresno State username and password.
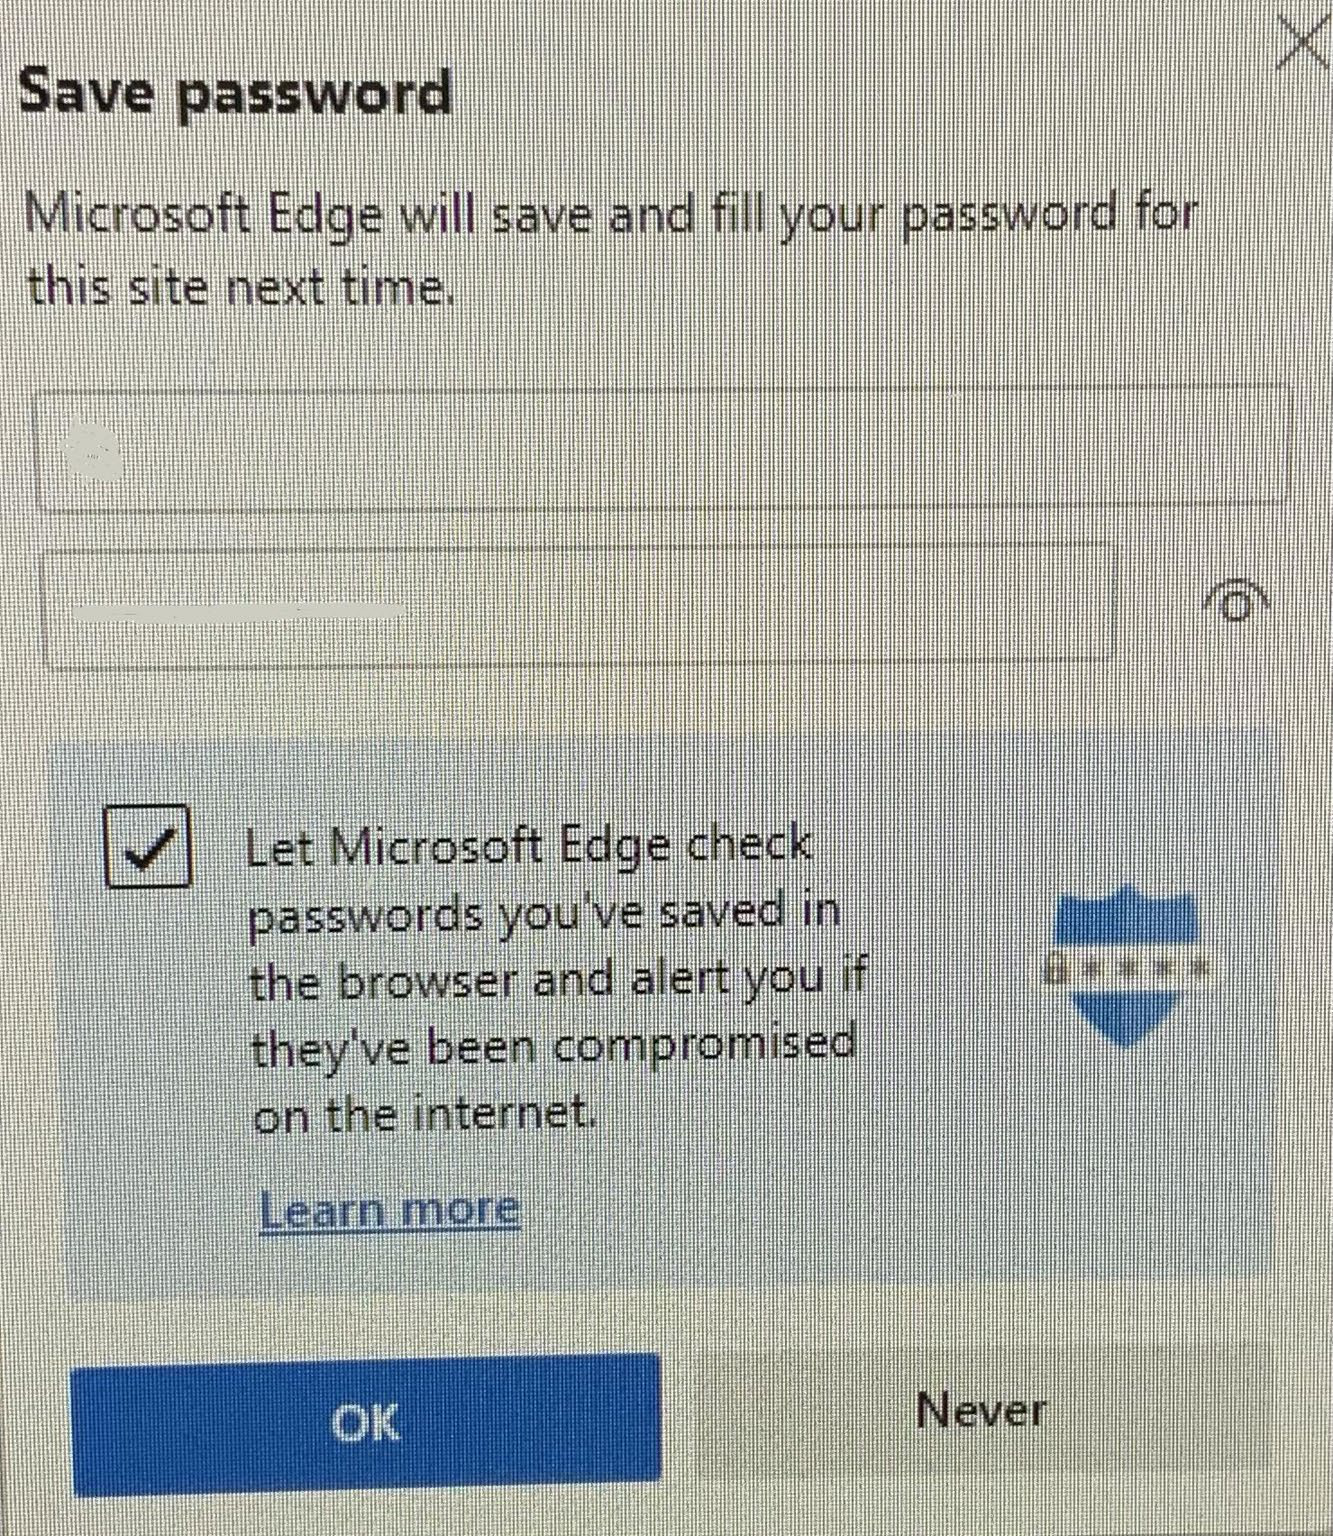
- Once logged in, Microsoft Edge will ask you if you want to save your password, choose “Never”
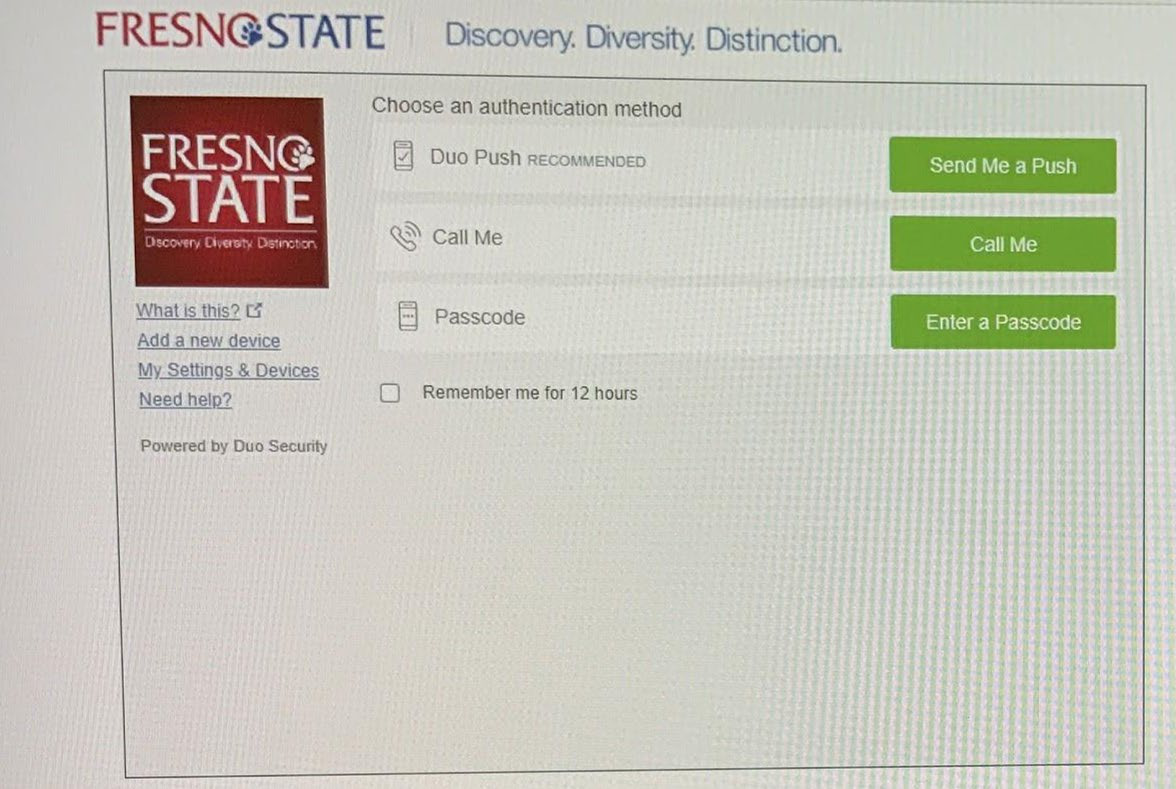
- Two factor Authorization will show on your screen and ask you to “Send Me a Push”, “Call Me” or “Enter a Passcode”. Before you make your choice, verify that “Remember me for 12 hours” is not checked.
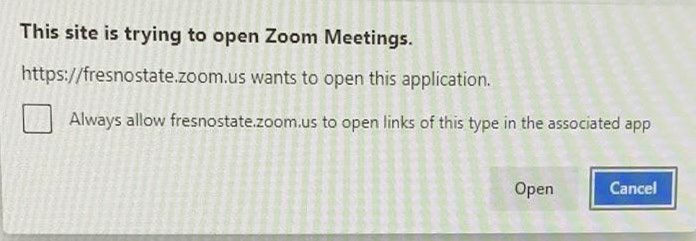
- On the next pop-up message, you want to check the box preceded by “Always allow fresnostate.zoom.us to open links of this type in the associated app” and click “Open Zoom Meetings”
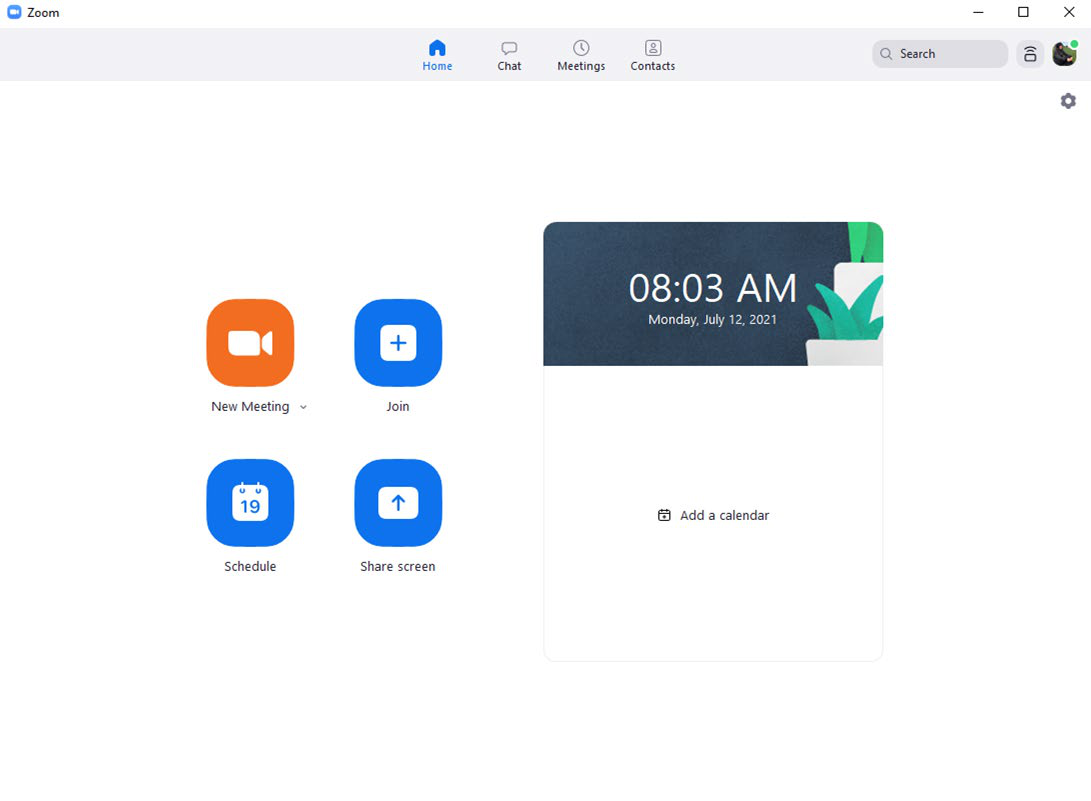
Before logging into the zoom meeting, check Zoom settings.
- On the Zoom Home Page, (see picture below) select Settings by clicking on the wheel on the upper right side of the screen
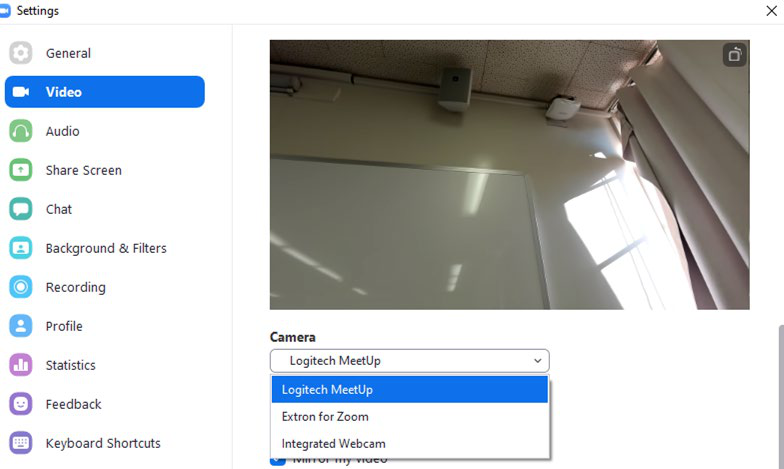
Now that you are logged into Zoom, you want to check the Video and Audio settings. Check Video and confirm you see yourself - adjust the monitor to your desired location
If screen is black, check the Camera setting and verify that it states “Logitech Meetup”
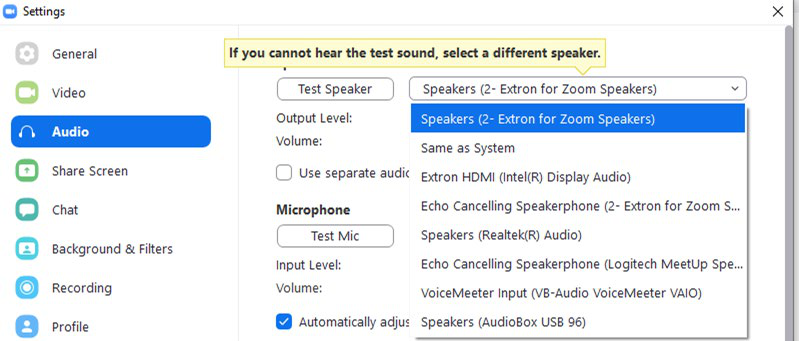
- Check Audio and verify that Speaker option shows “2-Extron for Zoom Speakers”
- Test audio by saying “Test 1, 2..” , the microphone meter should fluctuate with the sound test.
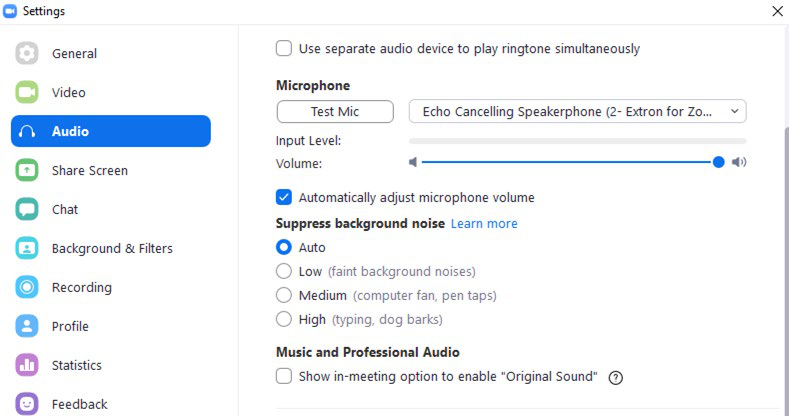
Note: if you are going to play videos, then go to the section under Music and Professional Audio and check the box named “Show in-meeting option to enable “Original Sound””
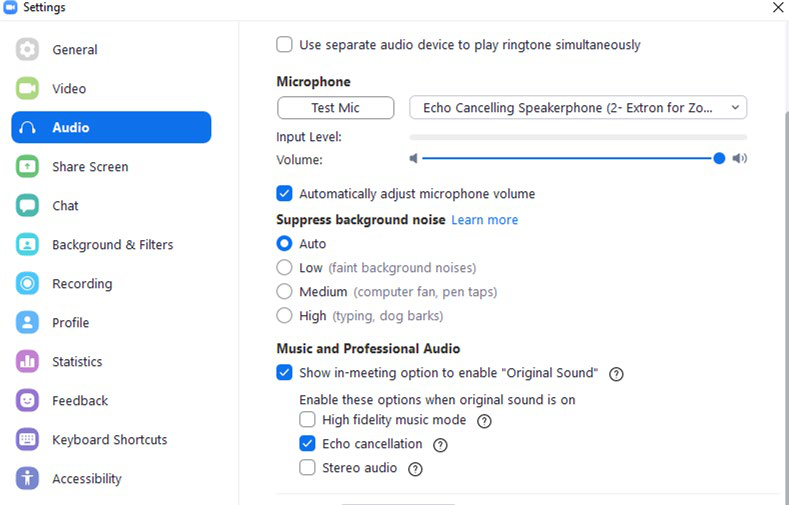
Note: The preceding steps will only be needed the first-time teaching in this classroom. Or if you are experiencing issues with sound and video during your class.
The following instructions are for operating the buttons on the Instructor Stations.
Classrooms are equipped with two different types of Instructor Stations controllers, digital or push button. Depending on the type of controller in the classroom, go to the instructions page for the appropriate controller. Page 11-13 is for digital control panels and pages 14-15 are for Extron control panels.
Classrooms with Digital Control panels
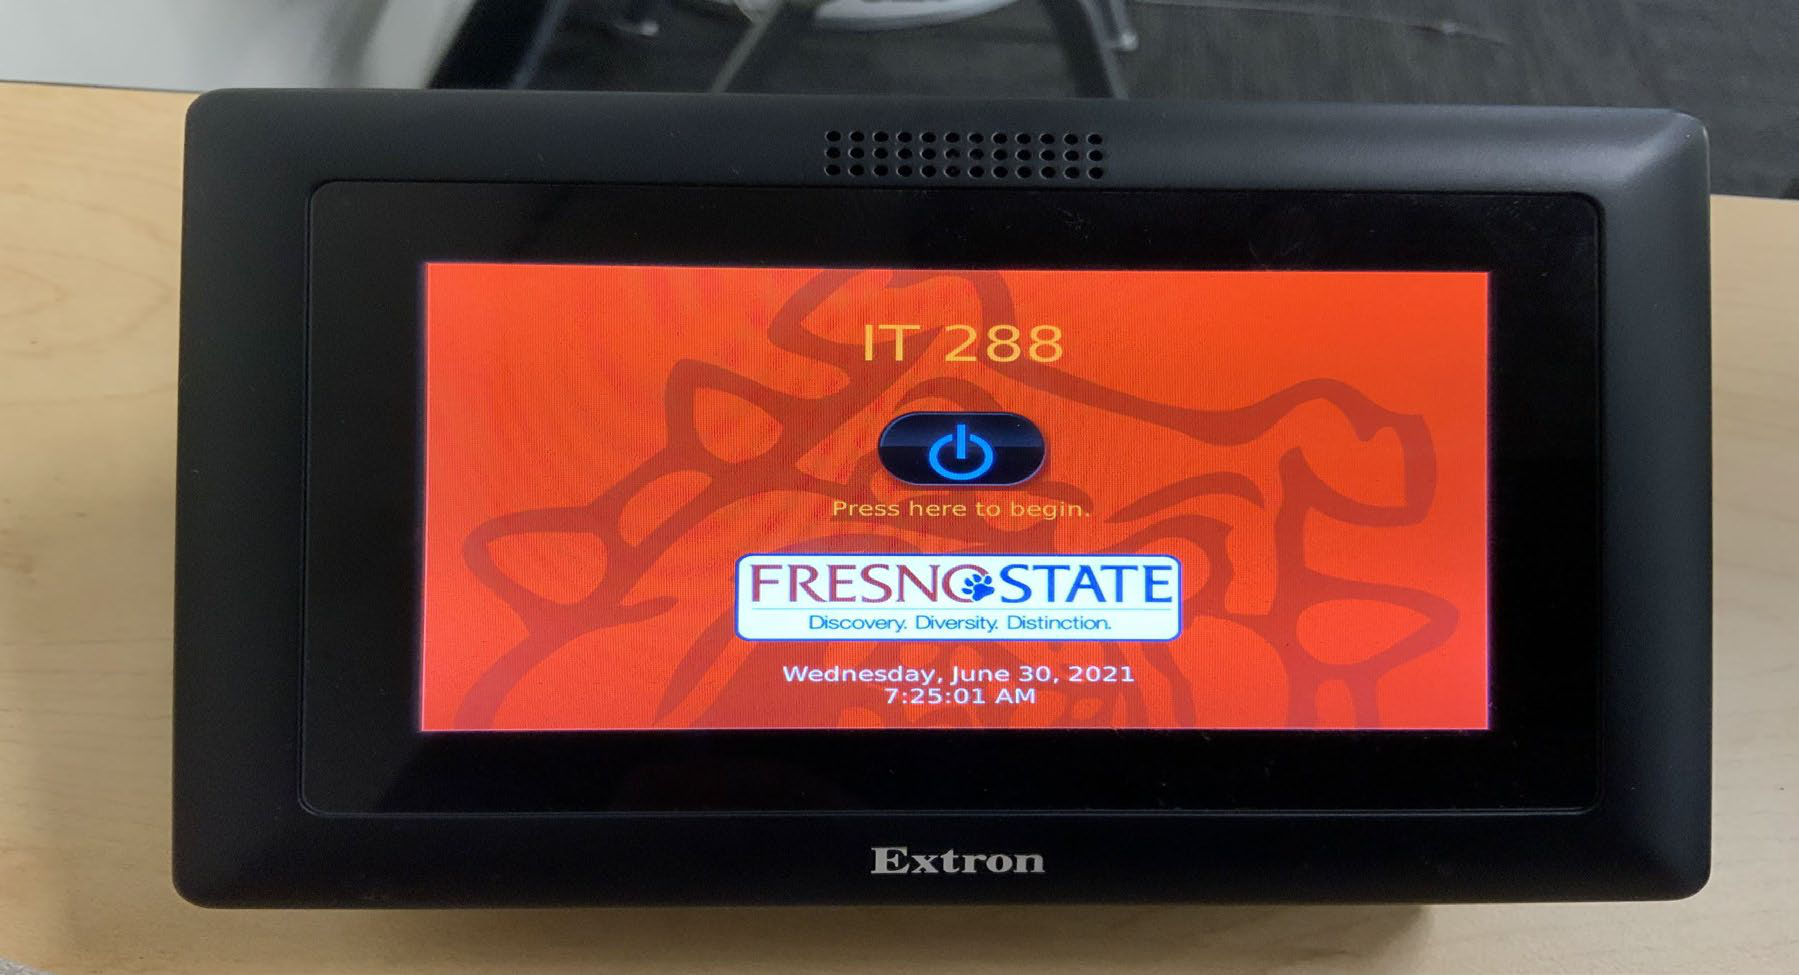
- Press ON button to power on the controller
On the Display Power, press ON to power on the projector.
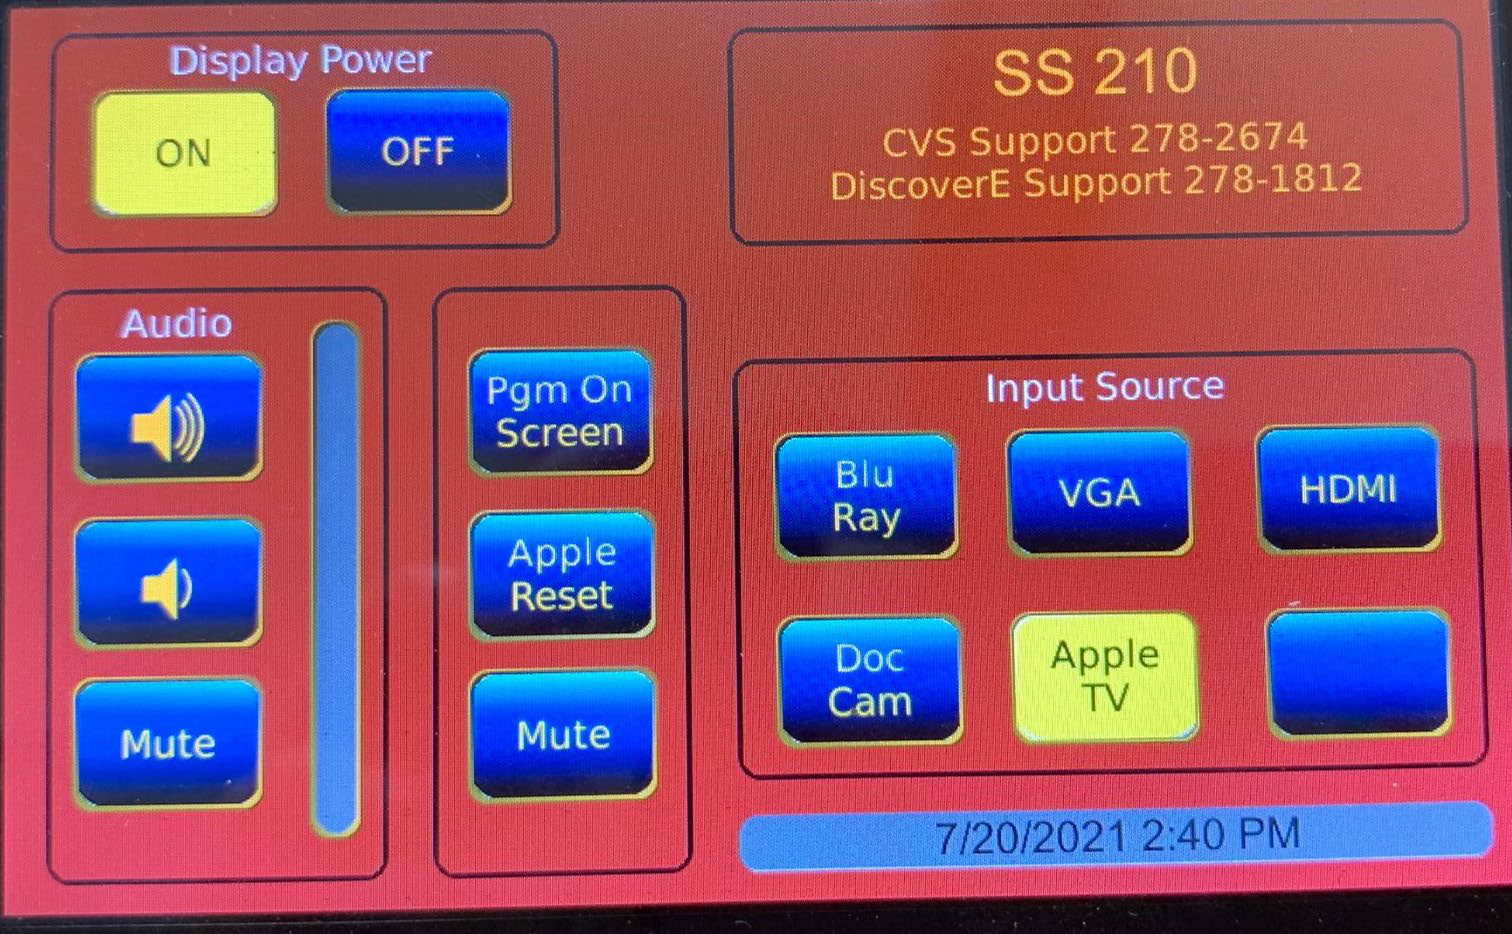
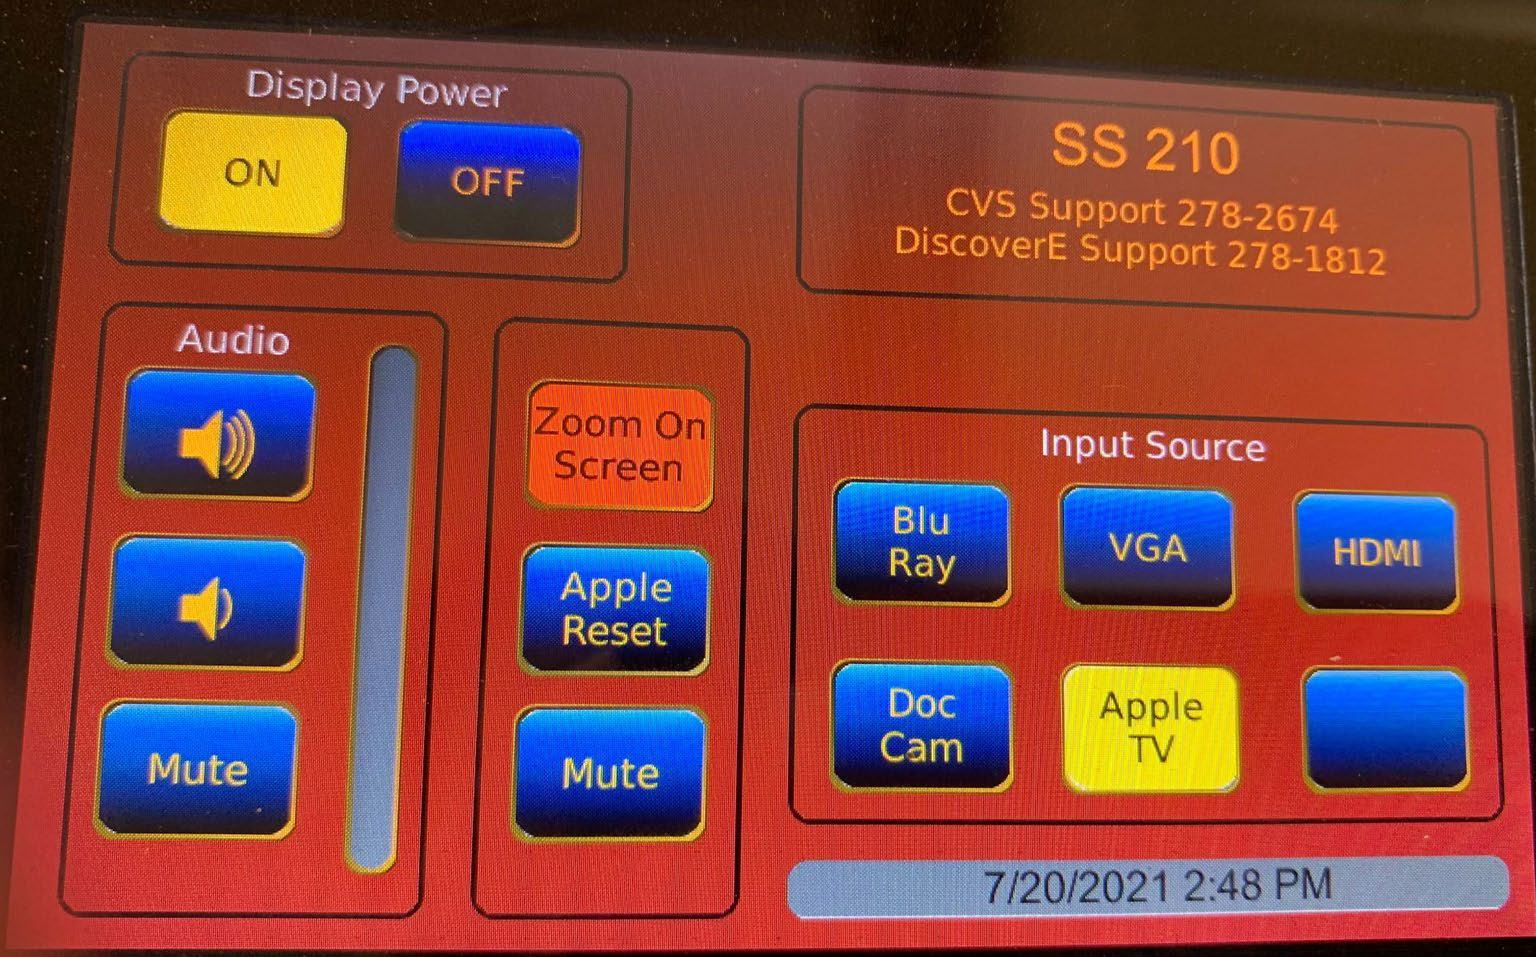
When the Pgm On Screen is Blue, this means that what is on your computer screen is not being displayed in the classroom.
When the Zoom on Screen is Red, this means that the information on your computer screen is being displayed on the classroom screen. This becomes very important when you’re entering your username and password because anyone in the classroom can see your information. Therefore, you want to have the Pgm On Screen in Blue clicked.
- Mic on - Green - everyone in Zoom can hear you
- Mic Mute - Red - no one in Zoom can hear you (flashing red)
Please note, normally you will use the mute button on Zoom, however, when you are playing a video, you should press Mic Mute in order to reduce background noise. The audio on the video will be better quality.
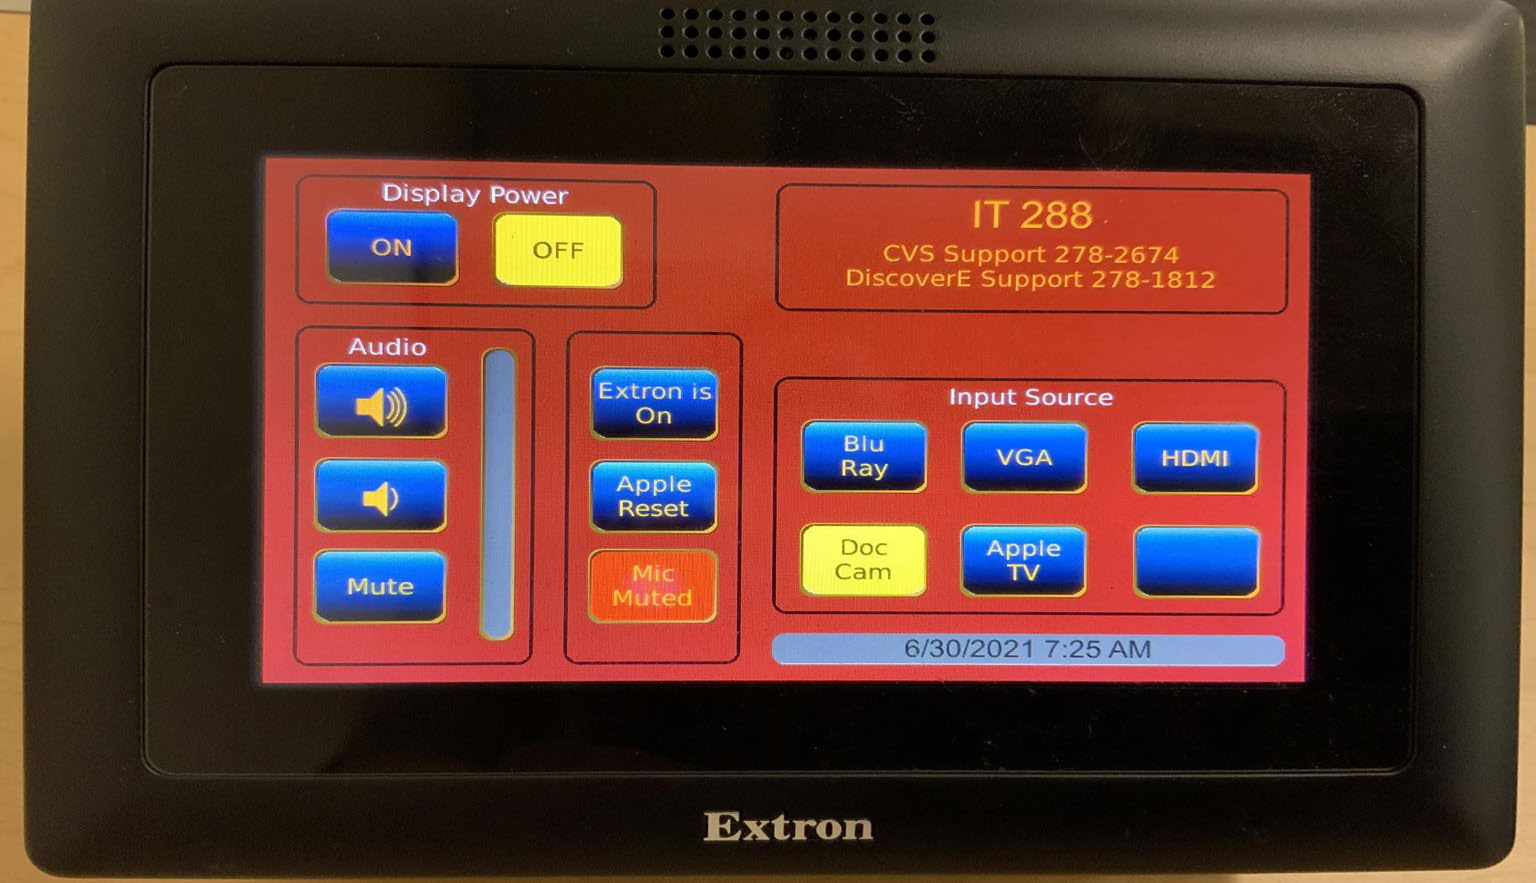
Classrooms with Analog Control Panels
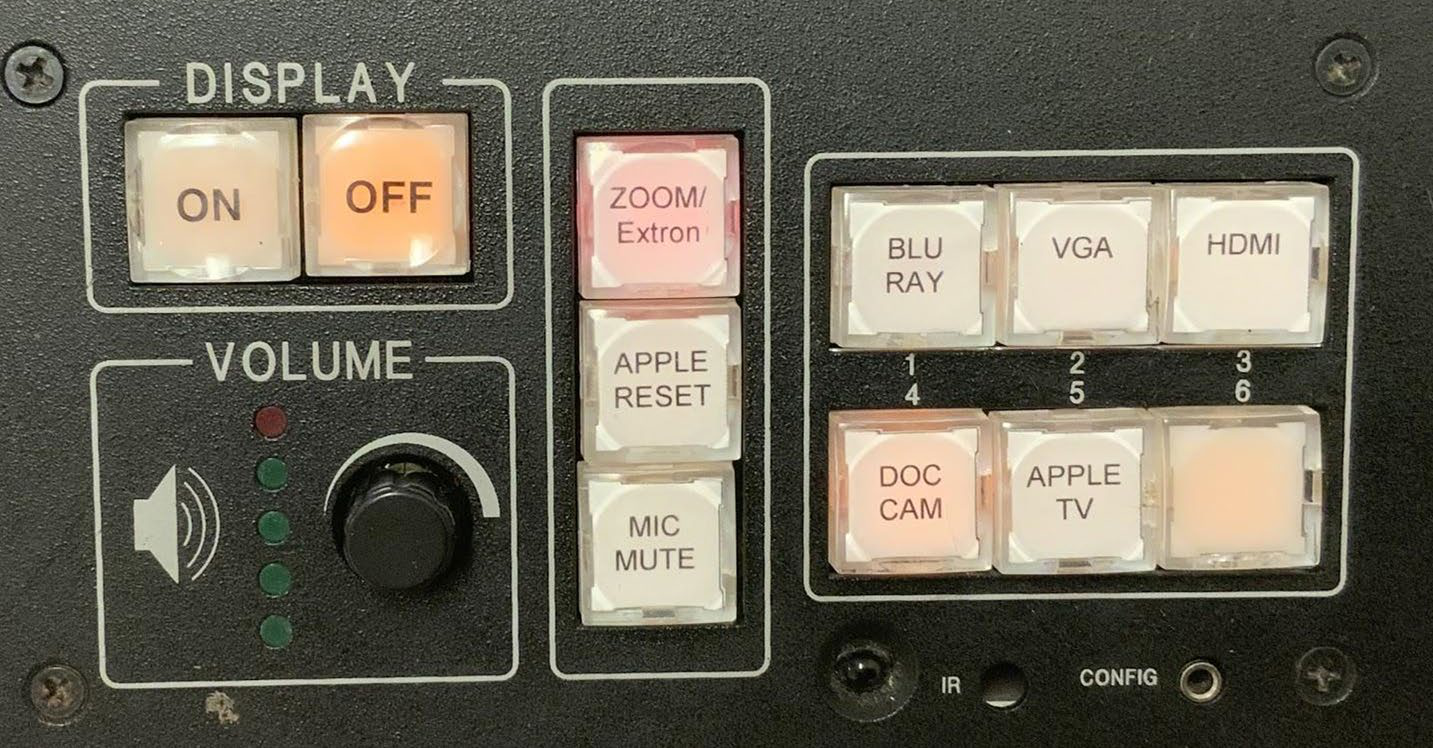
- On the DISPLAY section, press the ON button; this will turn on the power to the instructor’s station. Once the ON button stops blinking, the projector is ready to use.
- Zoom Extron = Clear (Green) - the picture on your computer will not display in the classroom. You want this option when you are typing in your username and password.
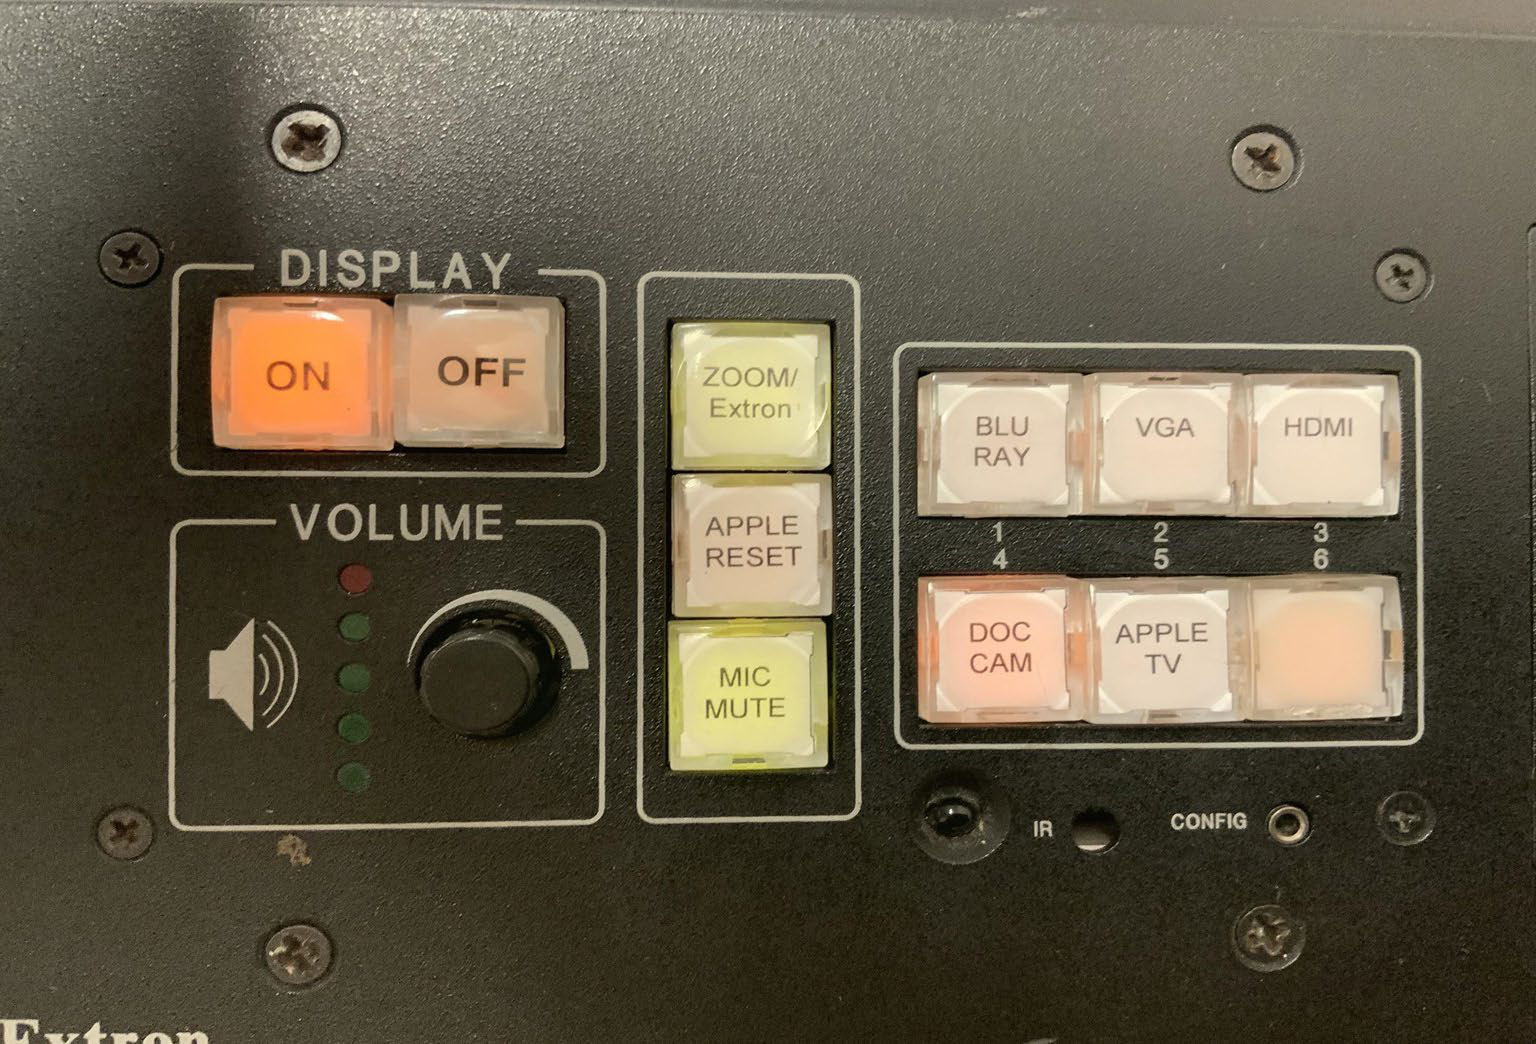
- Zoom Extron = Red - the information on your computer will display in the classroom
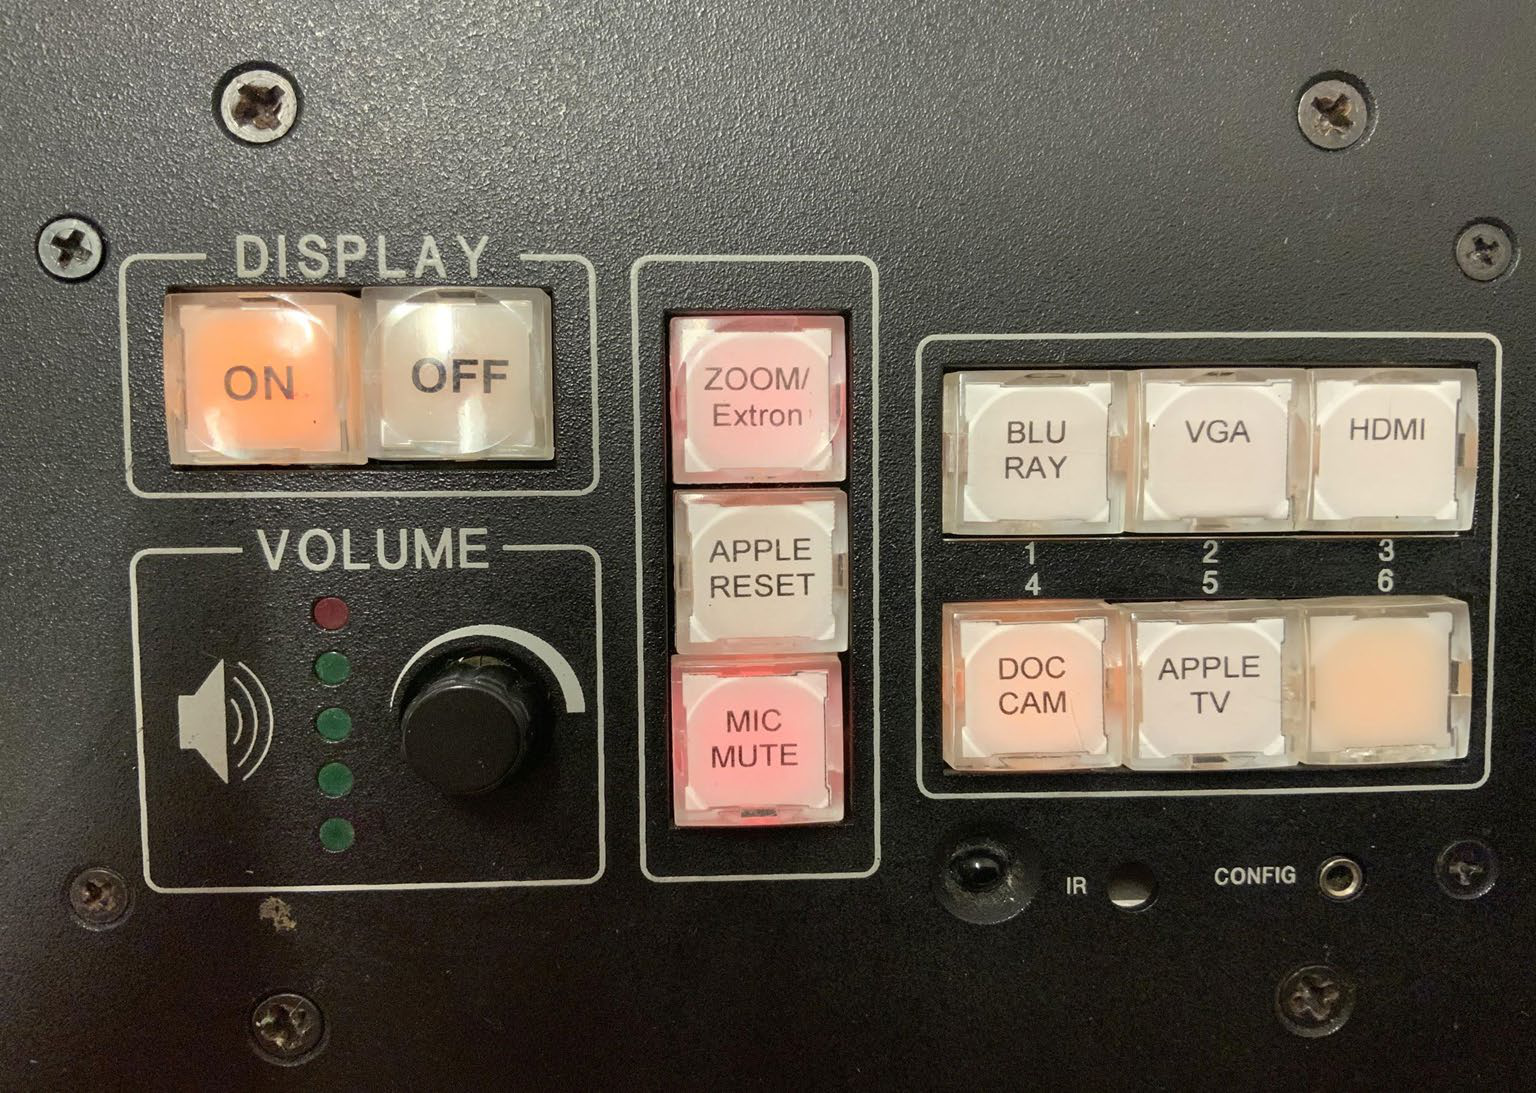
- Mic Mute - Red - no one in Zoom can hear you (flashing red)
- Mic Mute - Clear (Green) - everyone in Zoom can hear you
Please note, normally you will use the mute button on Zoom, however, when you’re playing a video, you should press Mic Mute in order to reduce background noise. The audio on the video will be better quality.
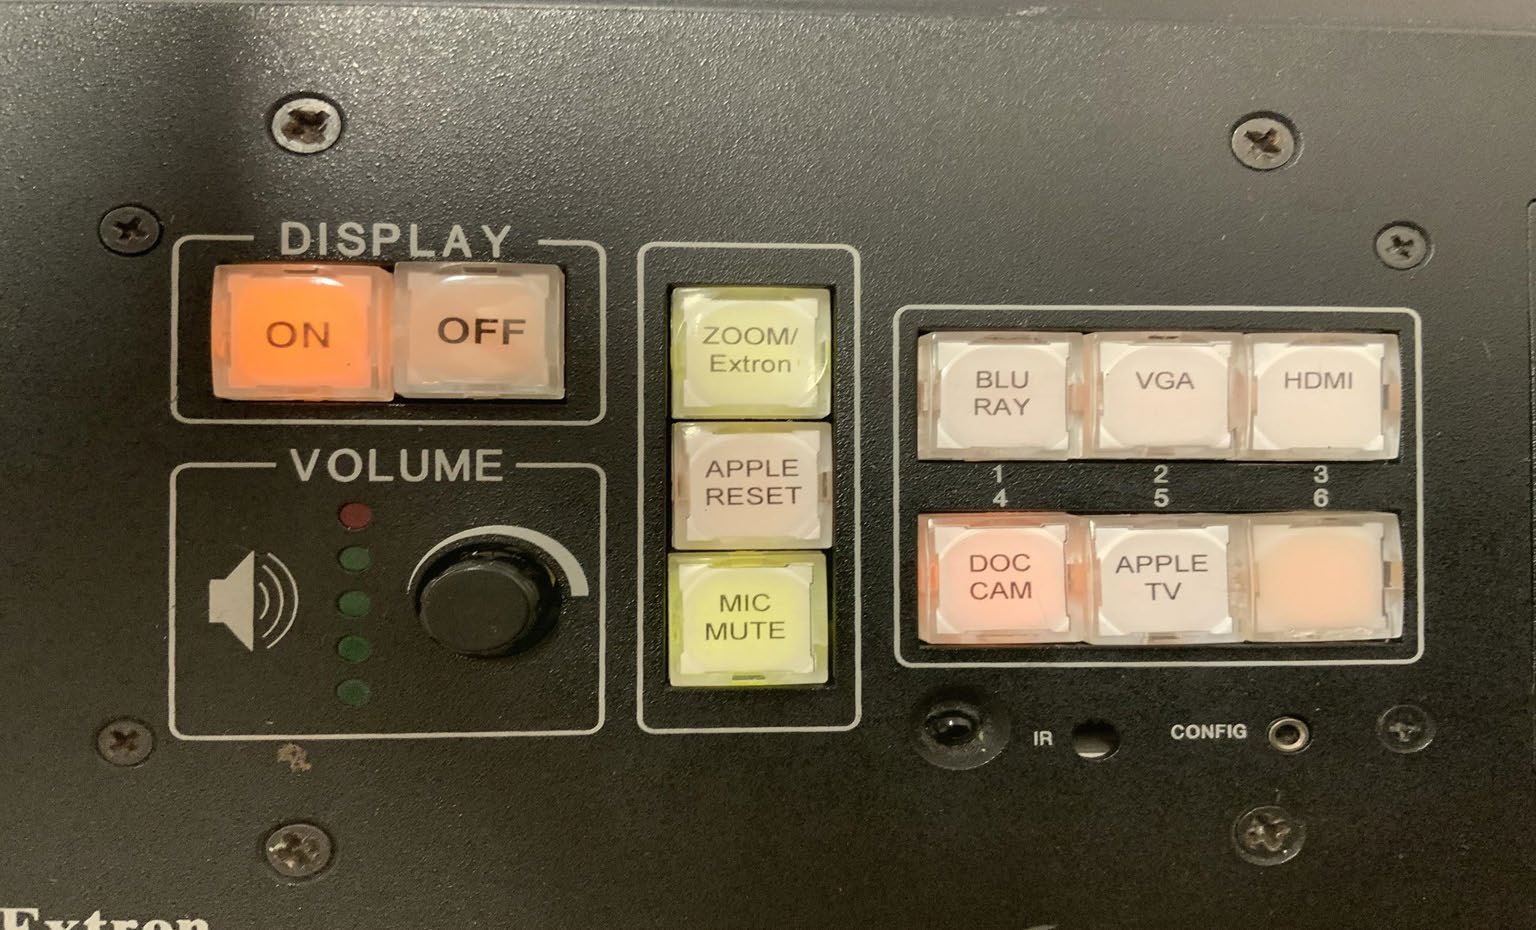
When you are ready to start the class, connect your preferred device and start your Zoom as you normally would.
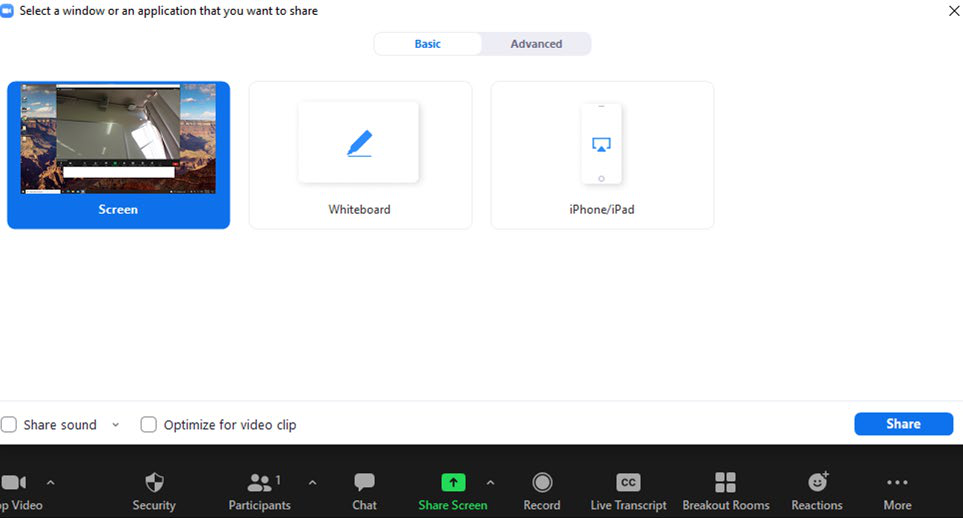
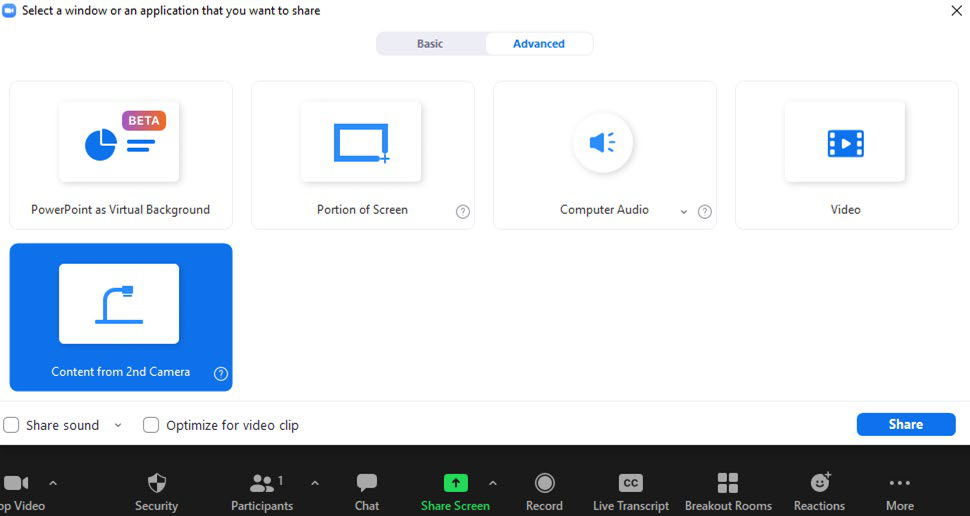
When you want to share your screen with all your students:
- go to Share Screen
- go to the Advanced tab
- choose Content of Second Camera
- press Share (bottom lower right of the screen)
Once your class is finished, please follow these steps before leaving the classroom.
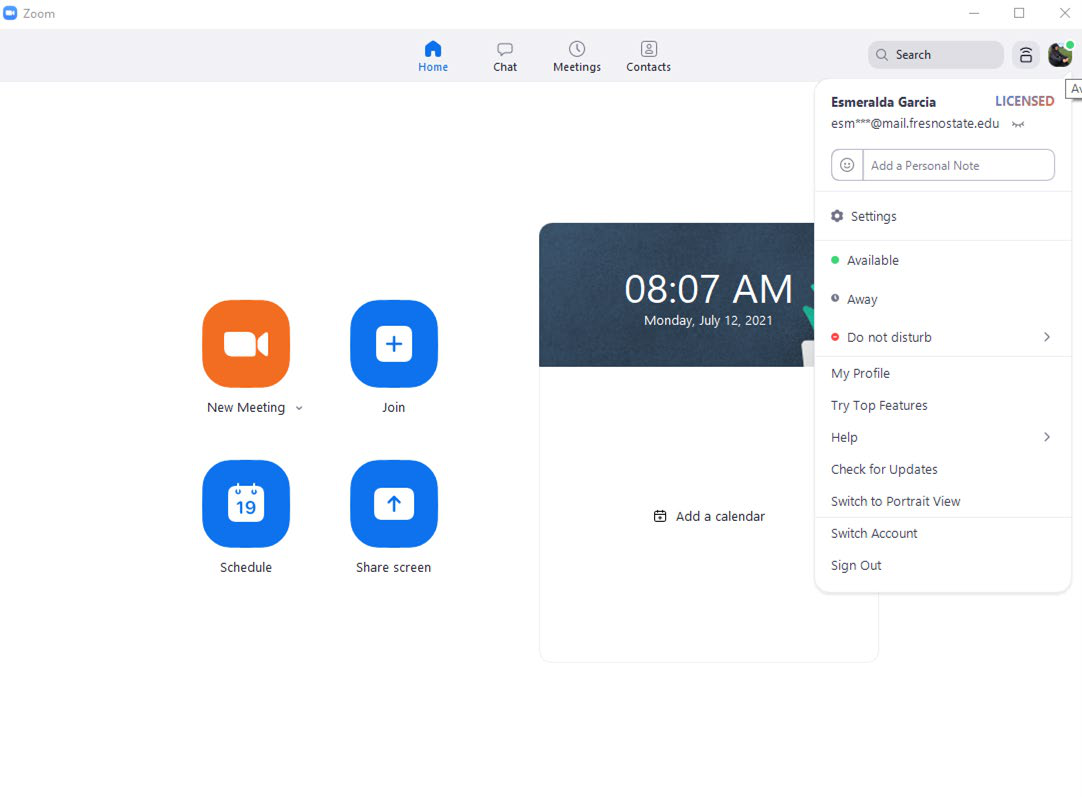
1) Sign Out Zoom
2) Power Down the Instructor’s Station by clicking on the OFF button
a) If you are on a digital control panel you will have to do a second step such as selecting “Power Down”
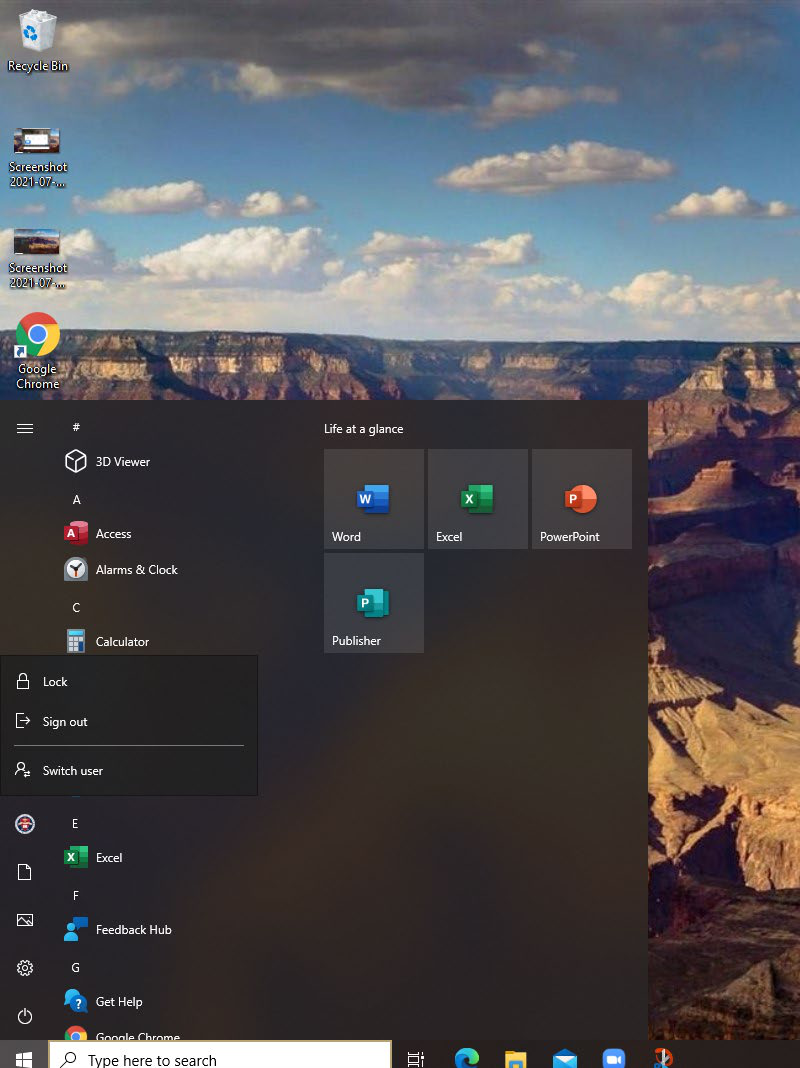
3) Log off the computer by pressing the Windows icon and looking for the Fresno State logo and choosing Sign Out
This PDF is provided as a print-only reference document and may not be fully accessible to users of assistive technology. For more information, please visit Title II Rule on Digital Accessibility page.